When logging in to an account an
unauthorized person can try passwords
frequently. This is unsafe. Therefore,
you would want to automatically lock
the account after a number of incorrect
entries.
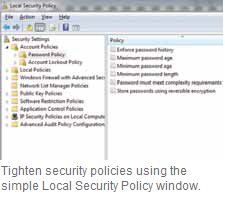
The default Windows settings enforce only simple passwords and limited protection. It makes more sense to lock the user account for a certain period after several failed attempts, with a security policy.
 If you have the Business, Professional
or Ultimate versions of Vista or Windows
7, the process is easy. In the search box
in the Start menu, type ‘Local Security
Policy’ and start the program that is
found. Now click the on the left on
‘Account Policy’ and then on ‘Account
Lockout Policy’. To change the lock
settings change the ‘Account Lockout
Threshold’ value to ‘3’ invalid login
attempts, for example, and confirm with
‘Apply’. Windows now automatically
enables the parameters ’Account lockout
duration’ and ‘Reset account lockout’ for
each of 30 minutes. Confirm the open
dialogue box with ‘OK’ and check the
changed security policy settings. Do not
extend the account lockout duration.
To defend against deliberate attacks,
this amount of time is sufficient. Close
all dialog boxes. Now after the defined
number of invalid login attempts, the user
receives a message that the account at
this point of time is locked.
For other versions of Windows, the setting can be made only from the command line. Just type ‘cmd’ into the search box, right click on ‘cmd.exe’ and select the context command ‘Run as administrator’. Type the command ‘net accounts’ to ask for the current configuration.
Here are the important parameters for the lockout, lockout duration and reset checking period. Set this with the commands ‘net accounts / lockoutthreshold:3’, ‘net accounts / lockoutduration:30’ as well as ‘net accounts /lockoutwindow:30’. Finally, you should double check that all values are typed correctly, since incorrect settings in extreme cases may permanently block your account. For emergencies, you should always still have an additional hidden administrator account set up.
The default Windows settings enforce only simple passwords and limited protection. It makes more sense to lock the user account for a certain period after several failed attempts, with a security policy.
 If you have the Business, Professional
or Ultimate versions of Vista or Windows
7, the process is easy. In the search box
in the Start menu, type ‘Local Security
Policy’ and start the program that is
found. Now click the on the left on
‘Account Policy’ and then on ‘Account
Lockout Policy’. To change the lock
settings change the ‘Account Lockout
Threshold’ value to ‘3’ invalid login
attempts, for example, and confirm with
‘Apply’. Windows now automatically
enables the parameters ’Account lockout
duration’ and ‘Reset account lockout’ for
each of 30 minutes. Confirm the open
dialogue box with ‘OK’ and check the
changed security policy settings. Do not
extend the account lockout duration.
To defend against deliberate attacks,
this amount of time is sufficient. Close
all dialog boxes. Now after the defined
number of invalid login attempts, the user
receives a message that the account at
this point of time is locked.
If you have the Business, Professional
or Ultimate versions of Vista or Windows
7, the process is easy. In the search box
in the Start menu, type ‘Local Security
Policy’ and start the program that is
found. Now click the on the left on
‘Account Policy’ and then on ‘Account
Lockout Policy’. To change the lock
settings change the ‘Account Lockout
Threshold’ value to ‘3’ invalid login
attempts, for example, and confirm with
‘Apply’. Windows now automatically
enables the parameters ’Account lockout
duration’ and ‘Reset account lockout’ for
each of 30 minutes. Confirm the open
dialogue box with ‘OK’ and check the
changed security policy settings. Do not
extend the account lockout duration.
To defend against deliberate attacks,
this amount of time is sufficient. Close
all dialog boxes. Now after the defined
number of invalid login attempts, the user
receives a message that the account at
this point of time is locked.For other versions of Windows, the setting can be made only from the command line. Just type ‘cmd’ into the search box, right click on ‘cmd.exe’ and select the context command ‘Run as administrator’. Type the command ‘net accounts’ to ask for the current configuration.
Here are the important parameters for the lockout, lockout duration and reset checking period. Set this with the commands ‘net accounts / lockoutthreshold:3’, ‘net accounts / lockoutduration:30’ as well as ‘net accounts /lockoutwindow:30’. Finally, you should double check that all values are typed correctly, since incorrect settings in extreme cases may permanently block your account. For emergencies, you should always still have an additional hidden administrator account set up.


0 comments:
Post a Comment
please write your comment
Note: Only a member of this blog may post a comment.